Bonsai Repotting: The Root Work That Keeps a Tree Small
The pot never gets bigger, so the roots have to get smaller. Repotting is not about giving a bonsai more room — it is the scheduled renewal that keeps a tree alive in a container the size of a dinner plate.
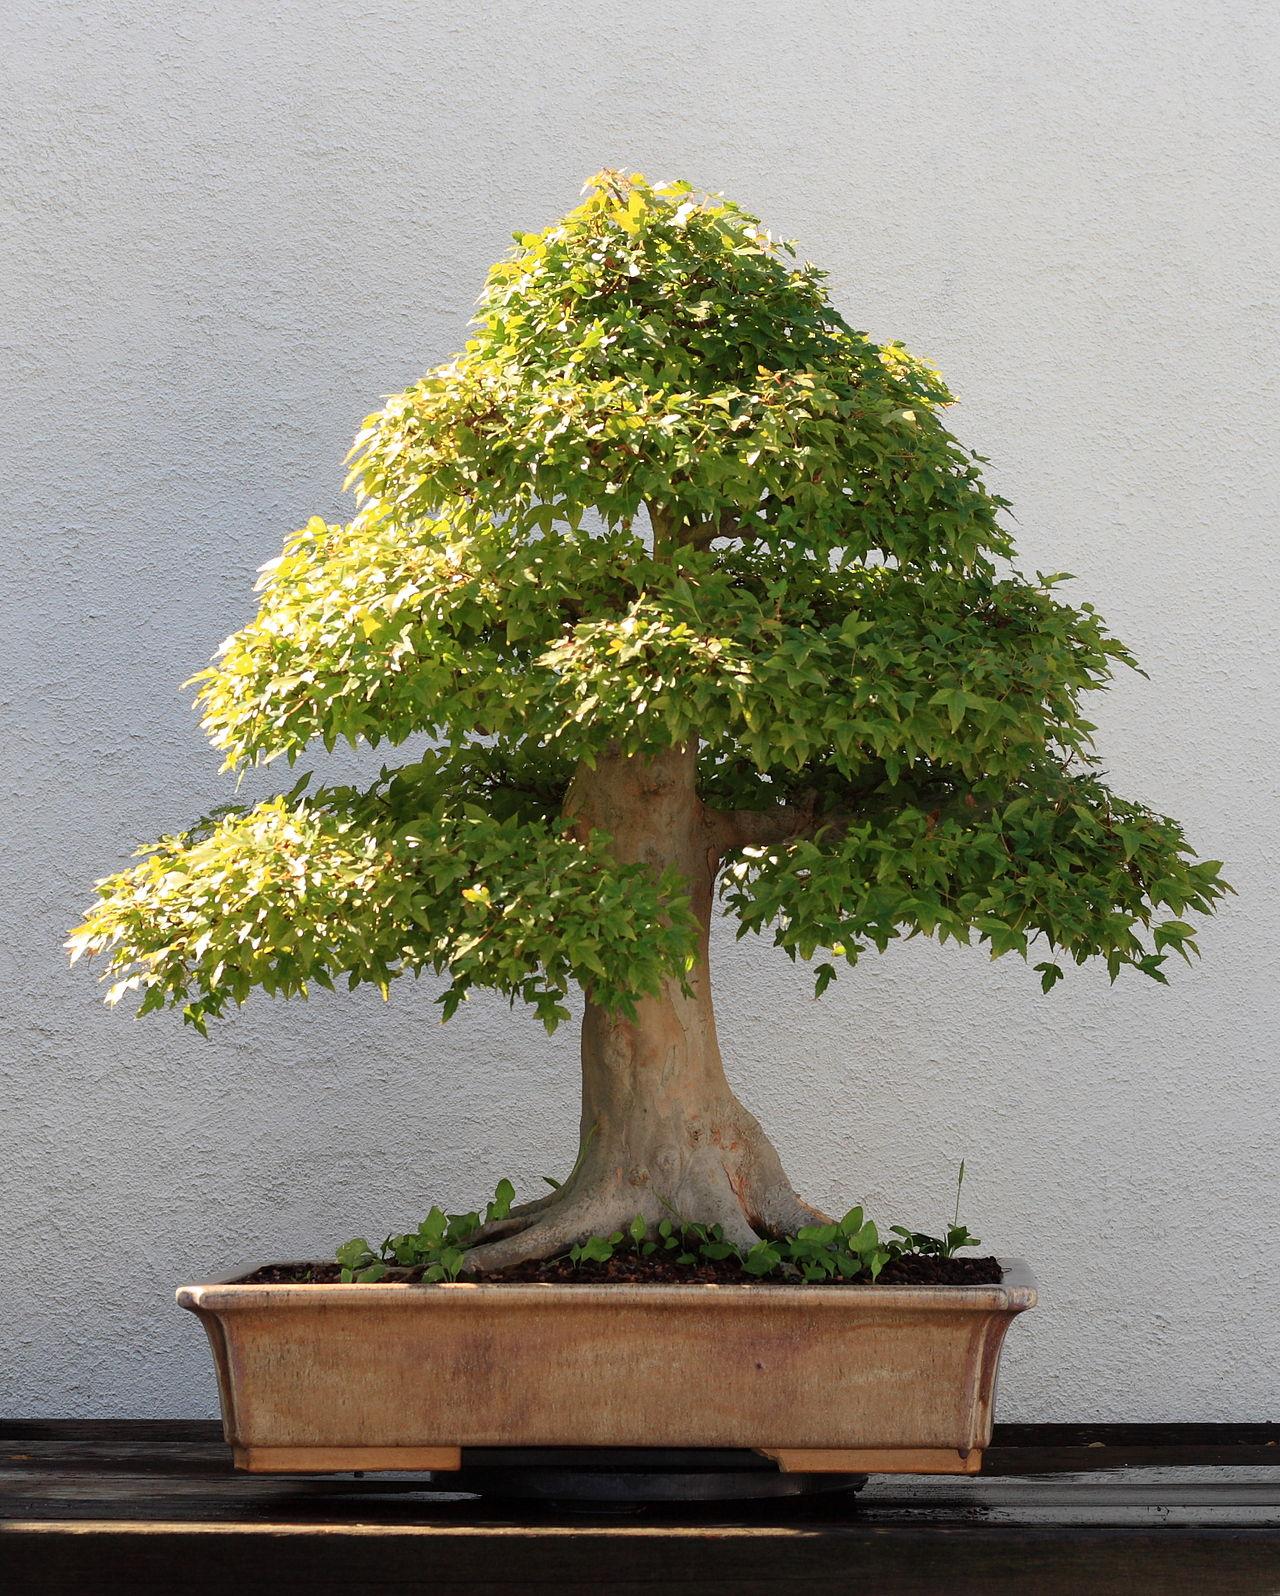
Photo: Bonsai cultivation and care by Sage Ross · CC BY-SA 3.0 · via Wikimedia Commons
01Why a bonsai gets repotted at all
The word is misleading. Repotting a houseplant means moving it into a larger container because it has outgrown the old one. Repotting a bonsai usually means putting it back into the same pot, having removed part of its root system — the point is not to give the tree more room, but to take room back.
A tree in a container fills that container with roots within a couple of years. Once it does, three things go wrong at once. Water stops penetrating and runs down the inside of the pot instead. The medium, compressed by root growth and broken down by watering, loses its air-filled pore space and the roots begin to suffocate. And the fine feeder roots — the ones that actually absorb water and nutrients — are crowded out to the edges by thick woody structural roots that absorb almost nothing.
Root pruning resets all three. It restores drainage and aeration, it removes the thick roots in favour of a dense mat of fine ones close to the trunk, and it renews the medium. It is the single operation that makes containerised trees viable over decades.
It is also the operation with the least room for improvisation. A badly timed repot, or one followed by careless aftercare, is the commonest way people lose a tree that had been doing well.
02When: read the buds, not the calendar
The window is early spring, as the buds visibly swell and before they open into leaf. At that moment the tree has committed to growing, its stored energy is mobilised, and it will push new roots into fresh medium within days. A month earlier, in true dormancy, cut roots sit in cold wet medium doing nothing and are vulnerable to rot. A month later, with leaves already extending, the tree is spending reserves on foliage it can no longer supply.
That is a description of a state, not a date. It arrives at different times in different climates and for different species, and it is why calendars in bonsai books are only ever approximate. Watch your tree.
Deciduous species — maples, elms, hornbeam — go earliest and recover most readily; they back-bud freely and tolerate more root reduction than conifers. Pines and junipers are typically worked slightly later, and are far less forgiving of having their roots stripped bare, partly because they depend on mycorrhizal fungi living in the existing root mass.
Tropical species kept indoors, ficus above all, are the exception to the whole framework. They have no real dormancy, and the best time to repot them is late spring or early summer, when warmth and light are at their strongest and recovery is quickest.
| Tree | Young / in development | Mature / refined | Timing |
|---|---|---|---|
| Deciduous (maple, elm, hornbeam) | Every 1–2 years | Every 3–5 years | As buds swell, before they open |
| Pines | Every 2–3 years | Every 4–6 years | Slightly later than deciduous; never bare-root |
| Junipers and other conifers | Every 2–3 years | Every 4–5 years | Mid to late spring |
| Tropical (ficus, Carmona, jade) | Every 2 years | Every 3–4 years | Late spring to early summer, in warmth |
| Flowering and fruiting species | Every 1–2 years | Every 2–3 years | After flowering, or as buds swell |
03How to tell a tree needs it
Do not repot on schedule. Repot on evidence, and the evidence is mostly about water behaviour.
The clearest sign is that water no longer soaks in. Pour it on and it either sits on the surface for several seconds before disappearing, or it vanishes instantly and runs out of the drainage holes almost as fast — the second means it is running down channels at the pot wall rather than through the medium.
Then look underneath. Roots escaping the drainage holes, or a root mass visibly lifting the tree out of its pot, are unambiguous. So is a tree that has to be watered twice a day in mild weather when it needed one watering last season.
Finally, tip the tree out and look — a check you can do without committing to anything. If the root ball lifts out as a solid felted pad that holds the pot's shape with no loose medium visible, it is due. If it crumbles and you can see plenty of open medium between the roots, put it back and wait a year.
04The operation, step by step
Have everything ready before you lift the tree out. From the moment the roots are exposed they are drying, and the whole job should take minutes, not an afternoon. Work out of direct sun and out of wind, and keep a mister or a damp cloth beside you.
Prepare the pot first: cover each drainage hole with plastic mesh held down by a wire staple, thread anchoring wires up through the holes ready to tie the tree in, and put down a thin layer of coarse drainage medium followed by a low mound of your mix where the trunk will sit.
- 1. Free the tree — Cut the old anchoring wires and run a thin blade or sickle around the inside wall of the pot, then lift the tree out cleanly by the trunk base rather than by the branches.
- 2. Open the root ball — Work with a root hook or chopstick from the outside inwards and from the bottom upwards, teasing roots free radially like combing hair away from the trunk. Take your time at the base of the trunk — the surface roots there are the nebari and are the most valuable part of the tree.
- 3. Cut, choosing what to keep — Remove around a third of the total root mass on a healthy tree. Cut out thick woody roots that plunge straight down, roots that circle the pot, and anything crossing under the trunk. Keep the fine fibrous roots radiating outwards near the surface — those are what feed the tree.
- 4. Rake and shorten evenly — Aim for a flat, shallow, evenly spread root pad that will sit in the pot without being folded or forced. If a root has to bend to fit, shorten it instead.
- 5. Position and secure — Set the tree on the mound, slightly off-centre and usually a little back from the front, and work it down with a gentle rocking motion. Tie it in firmly with the anchoring wires over the root pad — never over the trunk itself.
- 6. Fill and settle — Add medium and work it into every void with a chopstick, poking rather than pressing. Air pockets left against cut roots are where the trouble starts. Stop when the surface is a few millimetres below the pot rim.
- 7. Water immediately and completely — Water until it runs clear from the drainage holes. This settles the medium around the roots and rehydrates everything you exposed.
05Why bonsai soil looks like gravel
Newcomers reliably assume the coarse mineral mix in a bonsai pot is a stylistic choice, and reach for potting compost instead. It is not stylistic, and compost in a bonsai pot is one of the fastest ways to lose a tree.
A shallow container holds a saturated layer at its base regardless of what is in it — the shallower the pot, the greater the proportion of it that stays waterlogged. Fine compost in a shallow pot is therefore wet nearly all the way through, all the time.
Bonsai mixes solve this by holding water inside the particles rather than in the spaces between them. Akadama, a fired Japanese clay, absorbs and releases water internally while leaving large air-filled gaps around each granule. Pumice and lava rock add structure and permanent aeration. The result is a medium that is wet and airy at the same time, which is exactly what fine roots need.
Whatever you use, sieve out the dust before potting. Fines migrate down and clog the pore space, undoing the entire point of the mix.
| Tree | Akadama | Pumice | Lava / grit | Note |
|---|---|---|---|---|
| Deciduous | 2 | 1 | 1 | More akadama for water retention and fine roots |
| Pines and junipers | 1 | 1 | 1 | Sharper drainage; conifers hate a wet root ball |
| Tropical, indoors | 1 | 1 | 1 | Add a little bark or coir if your home is dry |
| Wet climate or heavy rain | 1 | 1 | 2 | Shift toward the mineral components |
| No akadama available | — | 2 | 2 | Pumice plus lava, with a little sieved bark for retention |
06Aftercare, which is where trees are actually lost
A repotted tree has lost a third of its capacity to take up water while keeping all of its foliage. For the next few weeks it is in deficit, and the aftercare is about closing that gap rather than pushing growth.
Move it into shade or dappled light and out of the wind for two to four weeks. Wind is the underrated hazard — it drives transpiration from leaves the reduced roots cannot supply, and it rocks the tree, tearing the new root tips as they form. This is the reason for tying the tree in so firmly.
Water carefully rather than generously. The medium should stay damp but never soaked; there are fewer roots drinking now, so it dries more slowly than you expect. Misting the foliage in the first fortnight genuinely helps, because it reduces water loss from the leaves while the roots recover.
Do not fertilise for three to four weeks, or until you see new growth extending. Fertiliser applied to freshly cut roots does not speed recovery and can scorch them. When you do restart, begin at half strength.
Protect from frost. Newly cut roots in fresh open medium are far more vulnerable to freezing than an established root ball, so a tree repotted in early spring needs shelter if a cold snap is forecast — an unheated shed, a cold frame, or simply against a house wall.
Then leave it alone. Resist the urge to check by lifting it, and expect the first flush of growth to be slightly smaller and later than usual. A tree repotted correctly in March is usually growing normally by June.
Frequently asked questions
- Can I repot in autumn instead?
- In mild climates, and for some species, yes — roots grow in autumn while the soil is still warm. But it leaves cut roots facing winter, so it is only sensible where hard frost is unlikely or the tree can be sheltered. Spring is the safer default.
- Do I have to use akadama?
- No. It is excellent and widely used, but a mix of pumice and lava with a small proportion of sieved bark grows perfectly good trees, and it does not break down as quickly in freezing climates. What matters is that the medium is coarse, sieved free of dust, and holds water without holding it everywhere.
- Should I prune the branches at the same time to balance the roots?
- On a vigorous deciduous tree, a light trim is fine and reduces water demand. On a conifer, or on any tree that is not clearly strong, do not — foliage is where the energy for regrowing roots comes from. Reduce the roots less instead.
- I missed the spring window. What now?
- Wait. A tree in leaf can be repotted in an emergency — if the medium has collapsed or the roots are rotting — but with a much lighter root reduction and serious aftercare. Otherwise water carefully through the season and repot next spring.
Lan Nguyen
Balcony grower & founding editor
Lan has kept ornamental plants on a 12 m² apartment balcony for eight years, mostly tropical foliage and small-scale bonsai. She writes the care and comparison guides here, and has killed enough plants to be specific about how.
Keep reading
Choosing Your First Bonsai: What Actually Matters
Most first bonsai die within a year, and it is almost never a styling failure. It is buying a tree that cannot live where you intend to keep it.
Bonsai Wiring: How to Shape a Branch Without Scarring It
Wire is how a bonsai gets its shape, and it is also how beginners permanently mark a trunk. The technique is not difficult — the timing and the removal are what people get wrong.
Ficus Bonsai: The Only Bonsai That Genuinely Thrives Indoors
If you want a bonsai on a shelf rather than a balcony, this is the genus that works. It tolerates dry air, forgives pruning mistakes, heals fast, and does not need a cold winter.